IMPORTANT: If you’ve already installed Tunnelblick on your computer, proceed to Step# 4 straightaway.
Step 1: Downloading Tunnelblick
Please download and install Tunnelblick application from the link below:
Download Tunnelblick Application
Note: If you’re having problems downloading, use CTRL+Click on the link (i.e. hold down the CTRL key whilst clicking on the link) and choose Save/Download Linked File As to the Desktop.
Step 2: Installing Tunnelblick
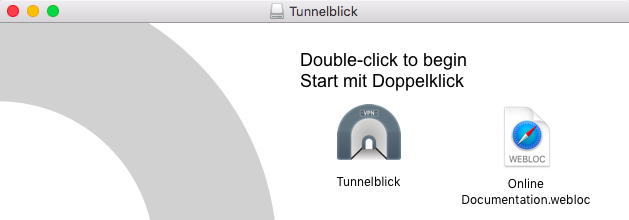
Now that you’ve downloaded Tunnelblick, you need to install the Tunnelblick first into your system. To do so, locate the Installer .dmg image file, i.e. on your Desktop. Double click on that file and Finder will show a new window. Next, double click the Tunnelblick icon.
Note: If Finder doesn’t show the new window, please navigate manually by clicking on the GO icon on your taskbar and choose Computer or Home. You should now able to find the Tunnelblick installer mounted under devices at the left panel of the finder window.
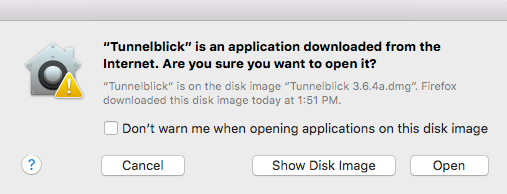
When you see the security warning, select Open.
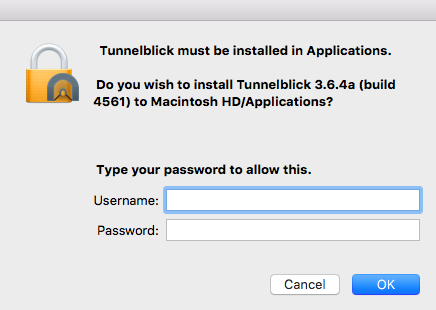
Step 3: Authentication
Tunnelblick needs special permission to install. When prompted please enter your computer’s credentials, this is the administration Username and Password on your Mac and not related to your account with us and select OK.
Once the Tunnelblick application Installation succeeded, you will be able to see a notification popped up at the top right of your taskbar.

Note: If you are getting any errors or having problems with installing Tunnelblick, please ensure any older version of Tunnelblick is removed from your system. To do so, you will need to completely uninstall any previous traces of Tunnelblick by following our Knowledge Base article below:
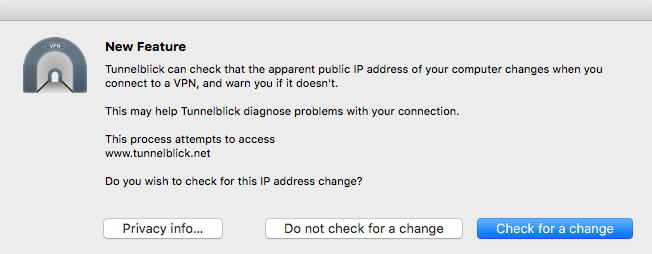
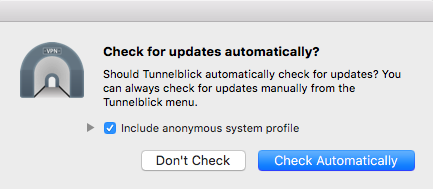
At this point, if any new update is released, Tunnelblick will prompt you automatically. Just proceed with the on-screen instructions and you may need to enter your local computer password to install the updates. At the New Feature screen, select on Check for a change.
Select Check Automatically for Tunnelblick to check updates automatically.
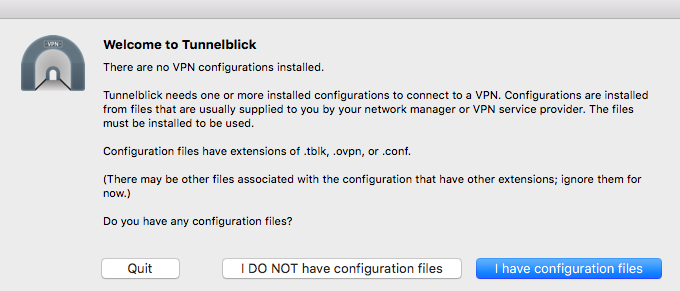
At the Welcome screen, select I have configuration files.
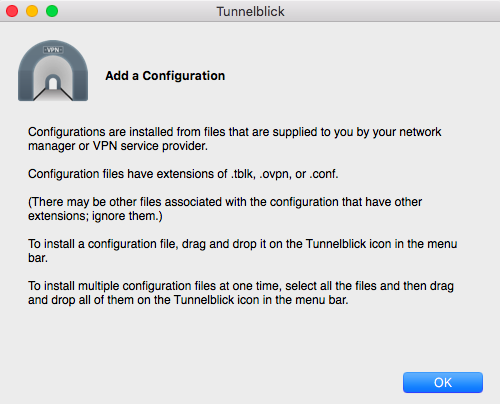
Next, select on OK at the Add a Configuration window.
Step 4 : Download & Installing Configuration File(s)
Download LeVPN configuration from the link below:
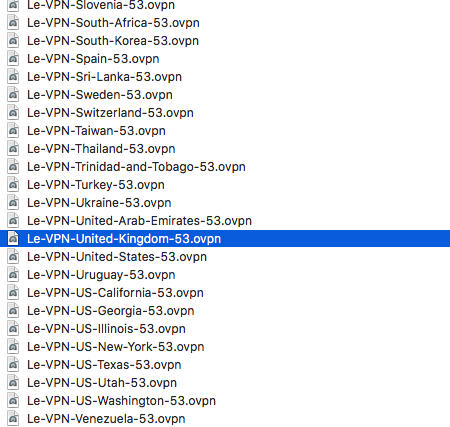
Next, double click on the configuration .zip file that you’ve downloaded earlier. i.e.OpenVPN-53-UDP.zip. The file should be saved on your Desktop or Downloads folder.
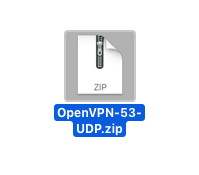
Once you opened the .OpenVPN-53-UDP.zip file, you should have list of configuration files that you can install. Install the one you wish to connect to. In this example, I will install the United Kingdom configuration by double clicking on it as I want to connect to UK VPN service.
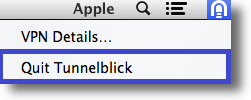
Note: If the file is not responding after your double-click on it, please close Tunnelblick application at the top right hand corner of your taskbar. To do so, click on it, choose Quit Tunnelblick and try to install the configuration file again.
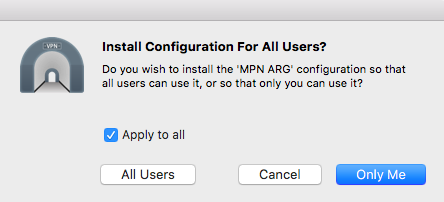
You can either choose to install the configuration for All Users which you’ve set up on your computer or select Only Me. You should also have an additional option called Apply to all. Please tick on it.
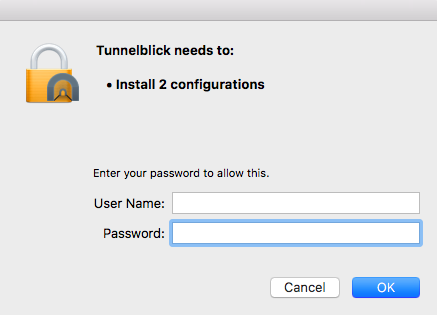
It will now prompt you to enter your local computer’s credentials again, this is the administration Username and Password on your Mac and not related to your account with us and select OK.
Once the Tunnelblick configuration Installation succeeded, you will be able to see a notification popped up at the top right of your taskbar.

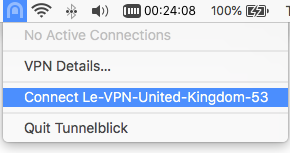
Step 5 : Enabling VPN Connection
Click on the Tunnelblick icon at your taskbar and select Connect MPN USA for US connections or whichever country you wish to connect to.
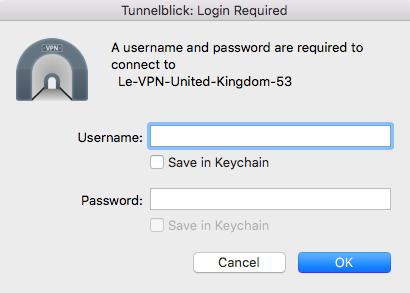
You will now be asked for your My Private Network Username and Password, these are the same details that you registered with us. Enter them and click OK.
Note: Your username is your unique name created under your account with us and NOT your email address.
After a few moments, the Tunnelblick icon should appear dark lit and this indicates that the VPN is connected.

If for any reason, the icon stays grey, click on it again and choose show VPN details. You can then see the reason it failed at the Log button and if necessary send these in to our support desk for assistance.
If you need any further assistance, please get in touch with our support team at [email protected]
