This page will guide you through to set up a PPTP VPN connection for our service on a MikroTik router.
The instructions below are done via WinBox on MikroTik’s RouterOS v6.18.
Step 1: Logging In and Launching WinBox
- Launch your web browser and access the MikroTik router’s admin page.
By default, the address is 192.168.88.1 but it might differ to yours. If you do not know the address of your router refer to the instructions lined below:
How To Find Your Default Network Gateway
The default username is set as admin and the password is blank.
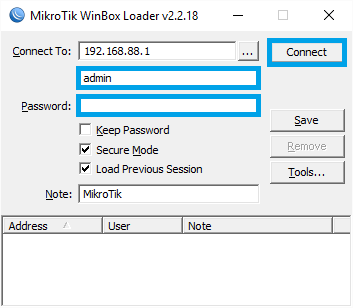
Please click on the Winbox icon located below the Login and Password boxes.

Note: Do not click on the Login button as this will log you into the WebFig interface. - Another login window will appear after the Winbox icon is clicked on.
Please ensure that the Connect To box shows the network gateway address ( router’s address ), and the username and password are correct.
Click on the Connect button to start WinBox.
Step 2: Adding a PPTP Client Interface
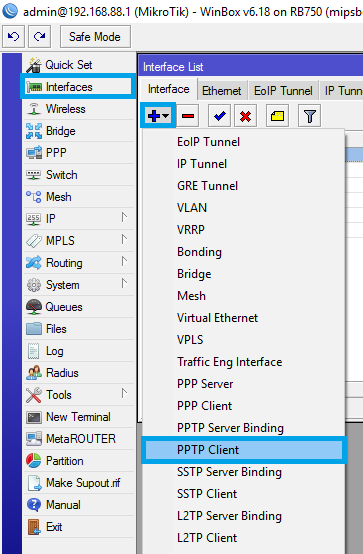
- Now that WinBox is launched, click on Interfaces on the sidebar, and the window Interface List will appear.
Click on the blue plus symbol ( + ) to add an interface and then click on PPTP Client.
- In the Interface window, select the General tab, and enter as below:
Name: MPN VPN

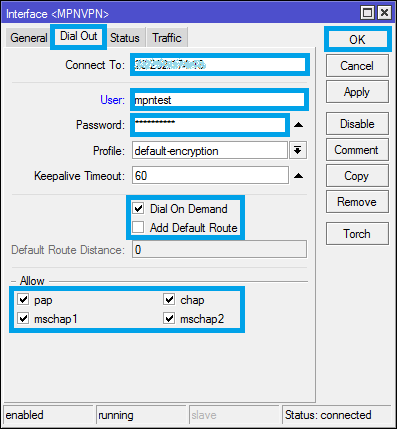
- After that, select the Dial Out tab, and please ensure that the details are as below:
Connect To: The IP address of our VPN server
User: Your VPN username
Password: Your VPN passwordDial On Demand: Checked
Add Default Route: Uncheckedpap: Checked
chap: Checked
mchap1: Checked
mchap2: CheckedOnce done, click on the OK button.
Note: Please contact our Support team at support@my-private-network.co.uk to know the IP addresses of our servers that you can connect to. Also, your VPN password is the same password that you use to log in to our website.
Step 3: Adding a Firewall Rule
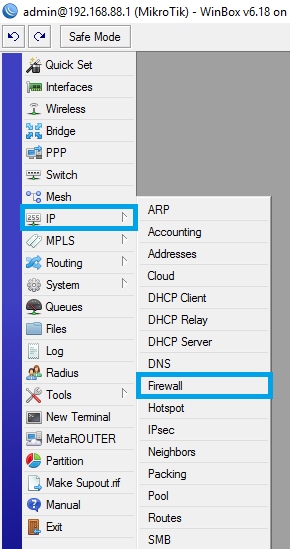
- Now go back to the sidebar and click on IP and then Firewall.
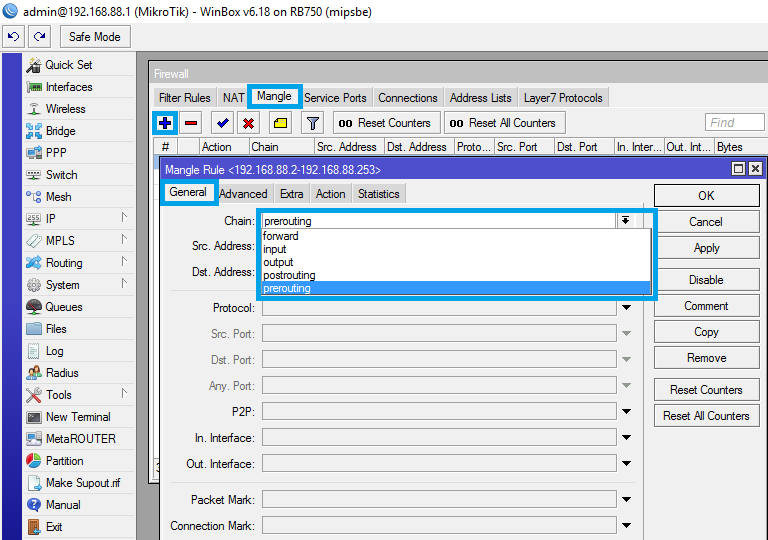
- The Firewall window will appear. Select the Mangle tab and click on the blue plus symbol ( + ) to add a Mangle Rule.
In the Mangle Rule window, select the General tab, and set Chain to prerouting .
- After that, select the Action tab, set Action to mark routing and for New Routing Mark, enter as below:
mpnvpn-route
Also, please ensure that Passthrough is checked.

Step 4: Adding a Route Rule
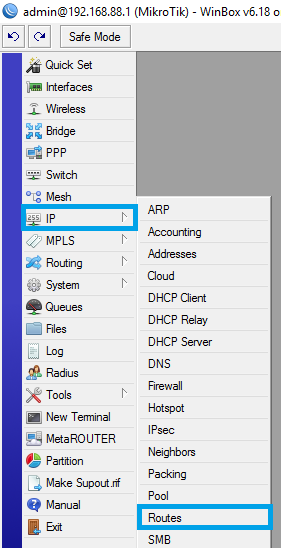
- Now go to the sidebar one more time, click on IP and then click on Routes.
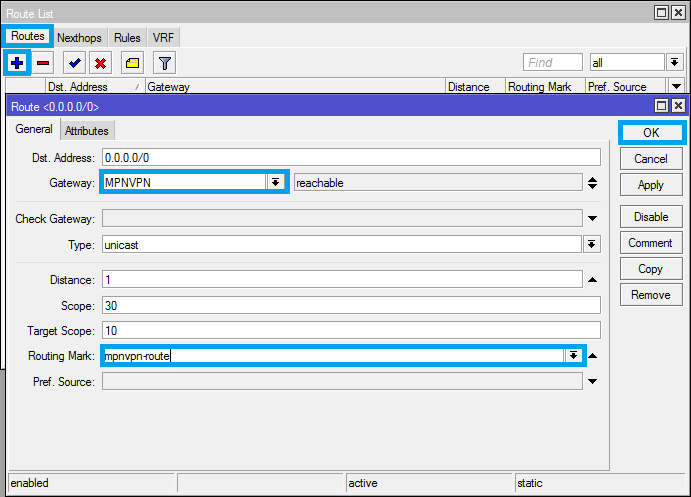
- A Route List window will appear. Click on the blue plus symbol ( + ) to add a Route rule.
In the Route window, select the General tab and set the options as below:
Gateway: MPNVPN
Routing Mark: mpnvpn-route
Once done, click the OK button.
Step 5: Connection Complete
MPN VPN is now set on your MikroTik router!
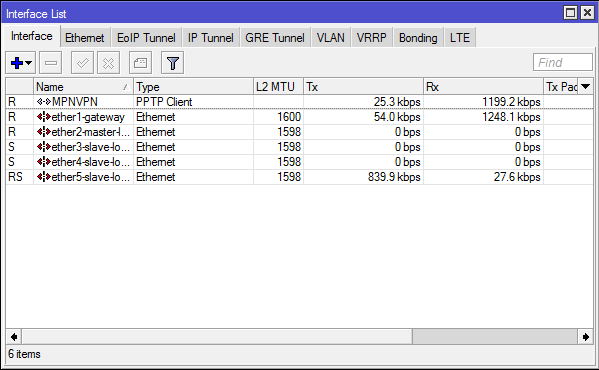
To check the status of your PPTP connection, click on Interfaces on the sidebar, and on the Interface List window, you will see the details listed with the name MPNVPN.
Note: If it does not connect immediately after you finish the setup, please restart your MikroTik router first.
Any Problems?
Unfortunately, it does not always go to plan!
If you have any problems or need any further information, please send us an email to support@my-private-network.co.uk and we will do our best to assist you.
